Introduction
Today, with the expansion of IT infrastructure and the increasing number of IoT devices, the number of machines generating valuable data for companies is also on the rise. This leads to a massive amount of data being generated every second from various sources, often in unstructured and complex formats. Consequently, it becomes more difficult to analyse the machine state in real-time, visualise the data, and detect any potential issues or risks.
This is where a tool like Splunk comes in handy. Splunk is a software, designed to search, analyse and visualise data in real time coming from various sources such as websites, applications, devices, sensors, and other components of IT infrastructure. It enables users to monitor their system, receive alerts and event notifications when a machine state changes, and learn from their data thanks to its sophisticated search and visualisation features. This blog post will be focused on illustrating all the steps required to configure Google Workspace as SAML Idp with Splunk Platform as SP.
But before starting with step-by-step instructions, let’s first explain what SAML is.
SAML (Security Assertion Markup Language) is a protocol used for securely exchanging authentication and authorization data between organisations. So, with the help of SAML a user in an organisation can use their existing identity in Google Workspace and then with SSO (Single Sign-on) they can easily access the Splunk Application.
So, let’s dive in with instructions steps…
Login flow for SAML IdP federation with Splunk Cloud Platform
Step 1: Create a Custom SAML app on Google
Step 2: Enable the Splunk App
Step 3: Create Groups on Google
Step 4: Mapping the SAML Attributes
Step 5: Enable SAML on Splunk
Step 6: Create a Group on Splunk
Step 7: Testing
Implementation Guide
Note: Before starting with the implementation of SAML with Google, It is assumed that the business requirements of organisations and company policies are clear and the architecture is ready to be implemented.
Step 1: Create a Custom SAML app on Google
Let’s start by creating a custom SAML application.
- Log into the Google Admin Console.
- From the Admin console choose Apps > Web Mobile Apps.
- Click on Add custom SAML app from the Add App dropdown.
- In the App details screen, fill all the necessary fields and then upload an optional app icon to identify the SAML application. Then, click Continue.
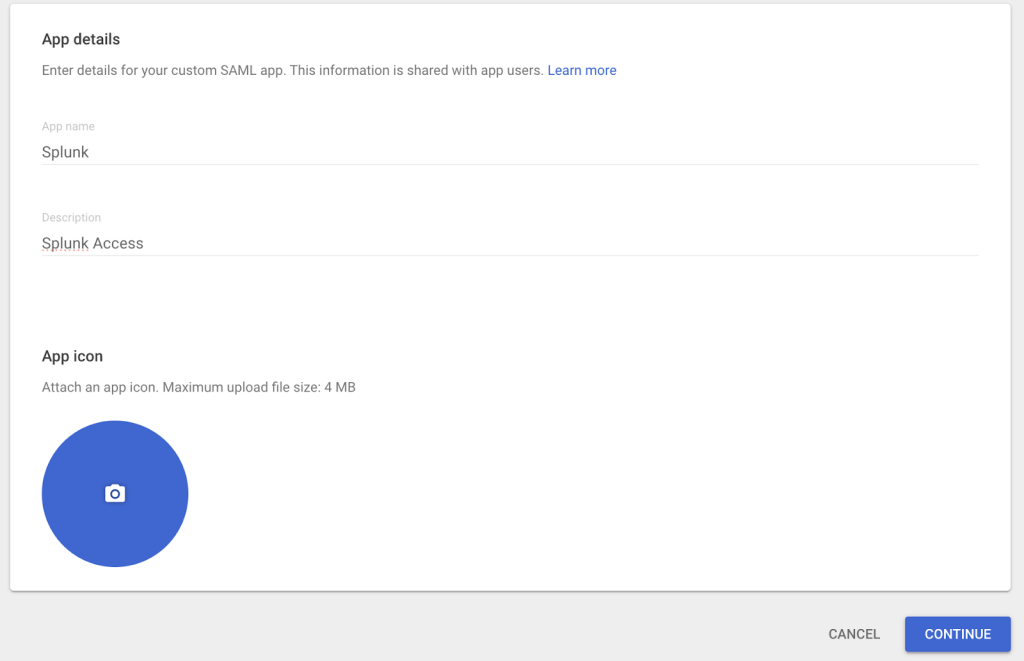
Figure 1: Naming the custom SAML app and setting the icon
- Under IdP metadata, click Download Metadata and save this to the download folder. This file is necessary later on for configuring the Splunk portion of the SAML setup.
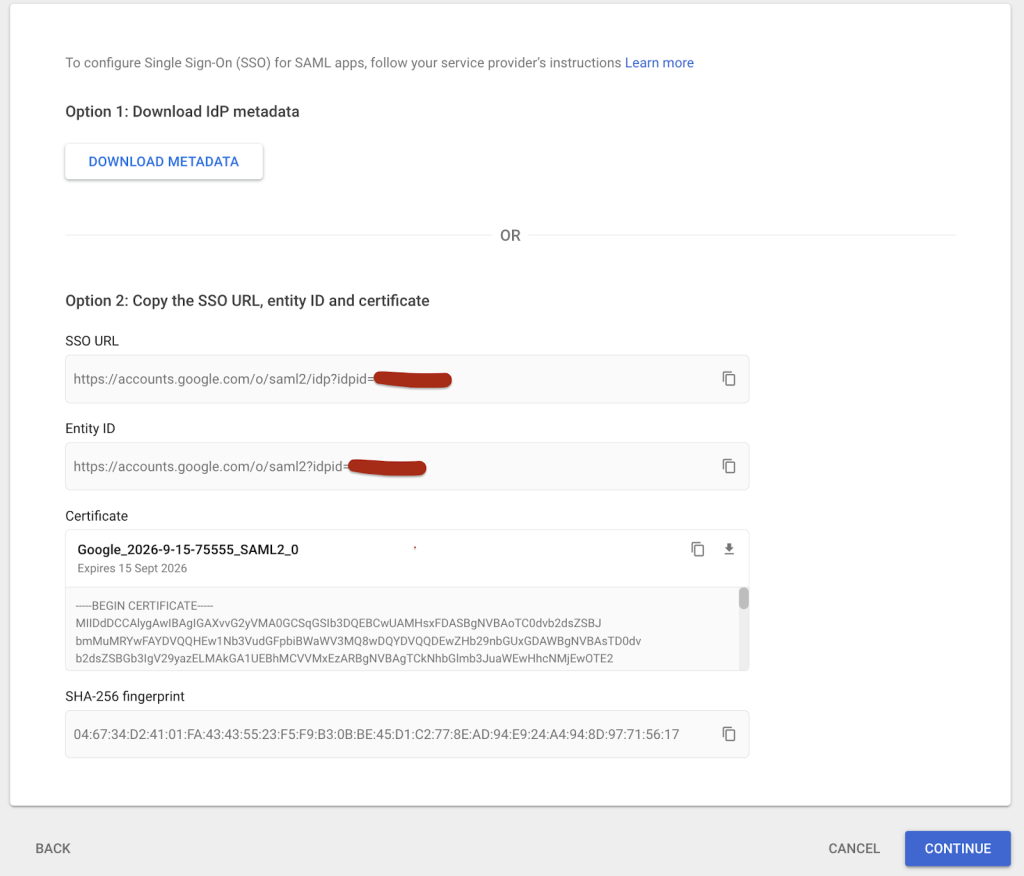
Figure 2: Download the metadata file
- Fill in the following values for ASC URL, Entity ID, Name ID format and Name ID
- Replace your Splunkdomain.com with your Splunk URL Instance.
- Click Continue.
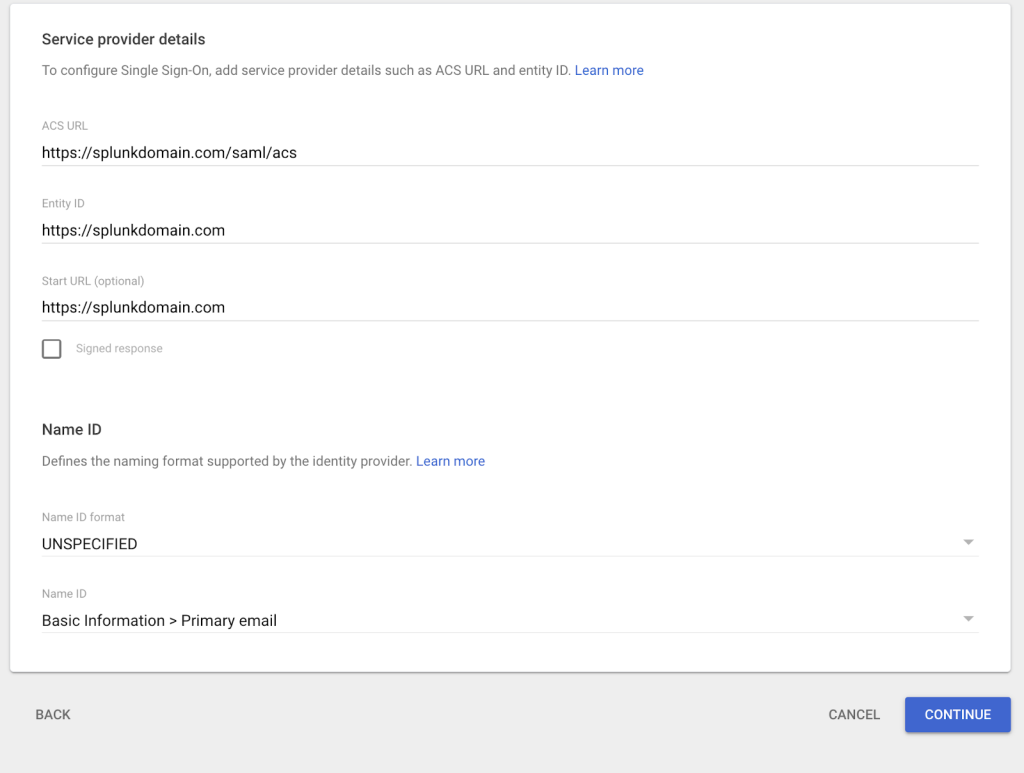
Figure 3: Fill the fields
- Click the Finish button. The Mapping will be added later.

Figure 4: Click Finish to continue in the next step.
Step 2: Enable the Splunk App
- Click on the newly created APP and then click on User access and select the status ON for everyone to make the new Splunk custom application visible to all users in the Google Workspace. Click Save.
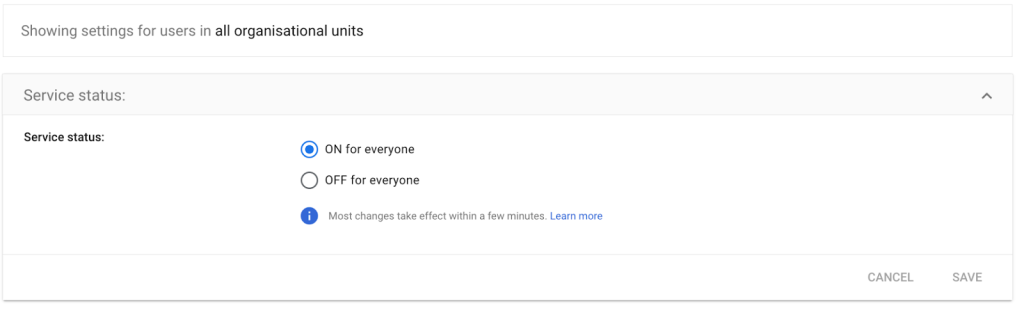
Figure 5: Saving the custom app settings
Step 3: Create groups on Google
- Sign In into the Google Admin Console.
- From Homepage, click Directory > Groups and click on Create Groups.
- Configure the Group Details.
- For enhanced security, turn on the security label. When you’re done, click NEXT.
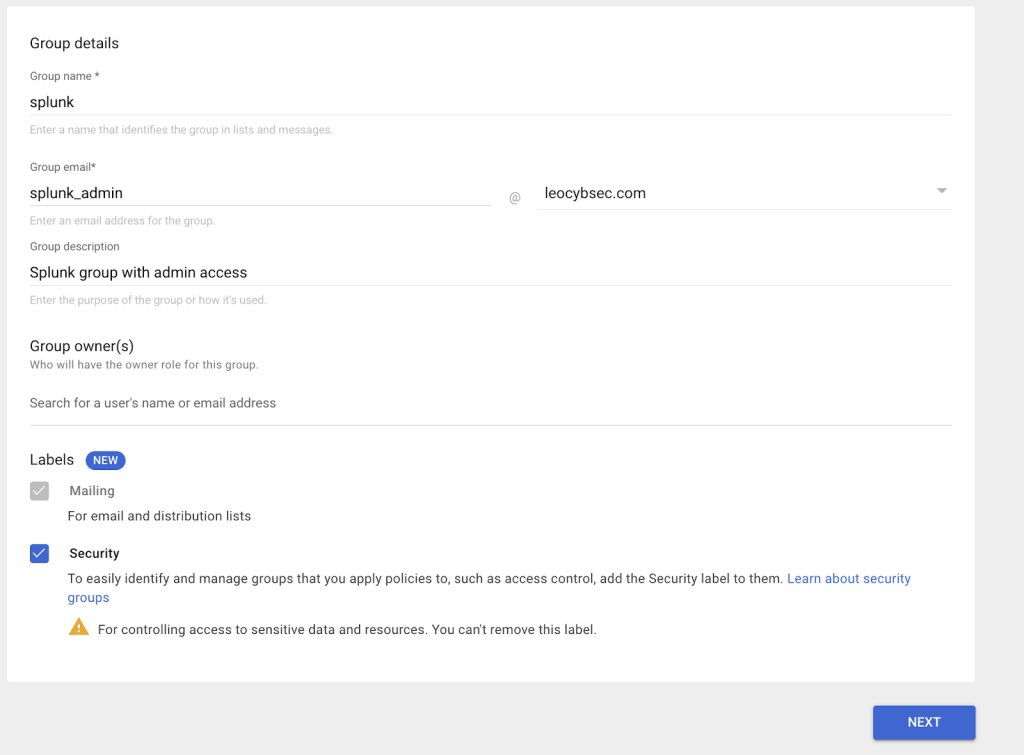
Figure 6: Create groups on Google.
- The access type and security settings will be determined by your business requirements. After you are satisfied with the configuration, select Create Group.
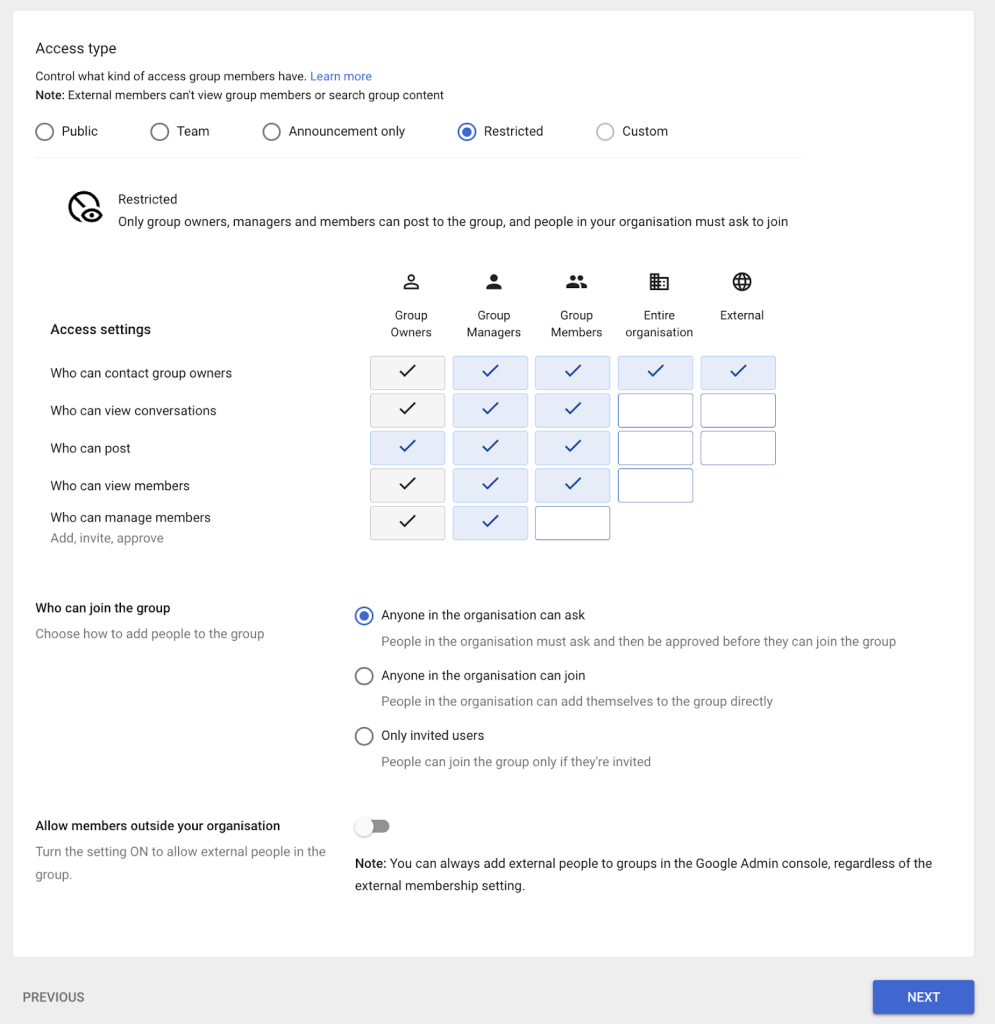
Figure 7: The groups are created on Google.
- After creating the group, provide the email address of the person you wish to grant access to and choose an owner for the group.
Step 4: Mapping the SAML Attributes
When integrating SAML, Splunk expects to get the following request parameters. Error will occur if they are not present.
- Name
- Role
- In the Google Admin console click on Apps > Web Mobile Apps, then choose the created Splunk app.
- Ensure the attributes are set in the following manner:
- Primary email → Email
- First name → Name
- Gws groups created in the previous step → role
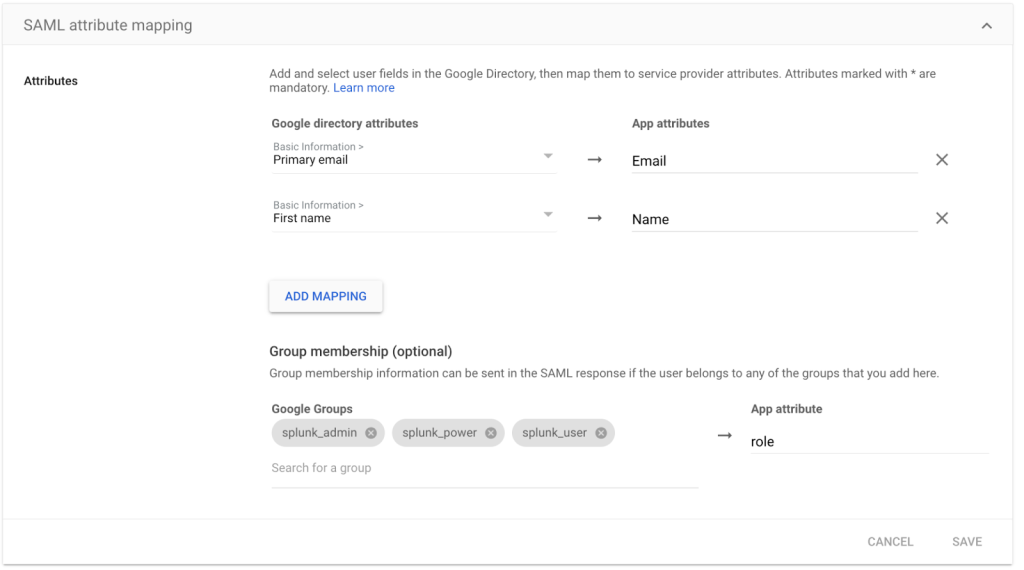
Figure 8: Mapping the SAML attributes.
Step 5: Enable SAML on Splunk
- After logging in to Splunk with a local user, navigate to Settings > User and Authentication from the menu, then choose Authentication Methods from the drop-down list.
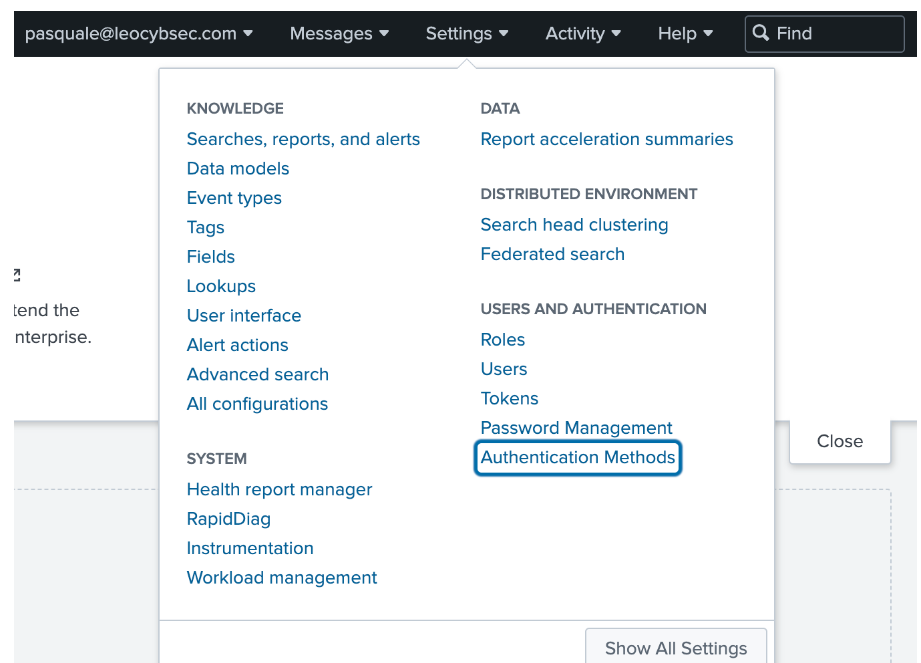
Figure 9: Choose Authentication Method.
- Click on SAML in the External checkbox under the Authentication Methods section.
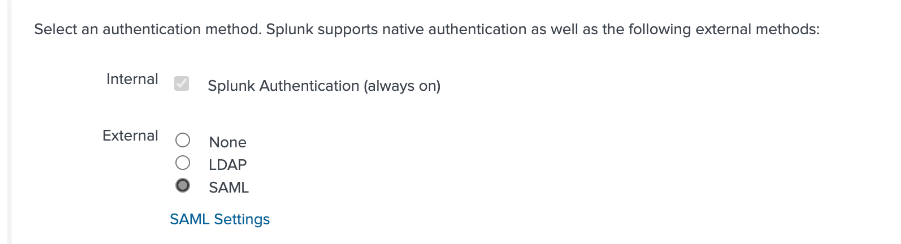
Figure 10: Choose SAML as Authentication Method.
- Click on SAML configuration.

Figure 11: Click on the button SAML Configuration.
- On the SAML configuration, click on the Select file next to Metadata XML file and upload the file downloaded earlier. This process will fill most of the configuration settings except for specific fields such as:
- Entity ID : https://YOUR-INSTANCE.com/
- Fully qualified domain name orIP of the load balancer: https://YOUR-INSTANCE.com/
- Redirect port – load balancer port: 443
- Redirect to URL after logout: enter a custom URL you want your user to be redirected after log out
- Click SAVE after the configuration has been given.
Step 6: Create a Group on Splunk
Splunk allows the implementation of fine-grained access control, allowing for careful management of data access and options within the Splunk platform. Out of the box Splunk comes with predefined roles but there is the option to create custom Roles based on your business requirements. In this instance a pre-defined role will be assigned to a group
- From the SAML group page, click on New Group.
- Add a group name and assign a specific Role to the Group and click on Save.
- The group name should match with the group name created in GWS. If there is GWS group called splunk_admin we must create a group in splunk called splunk_admin
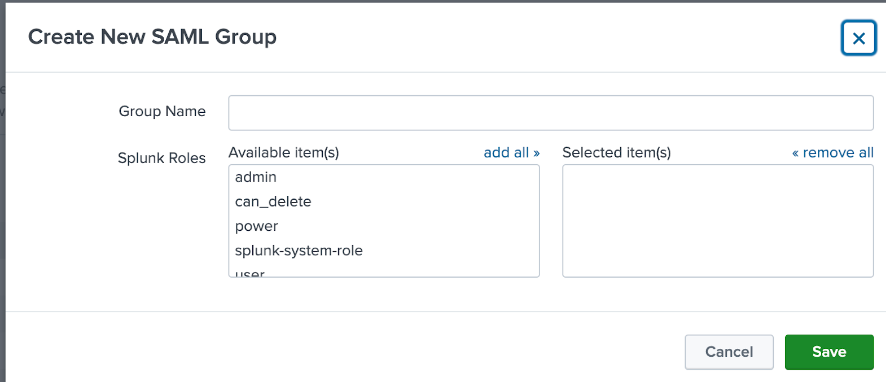
Figure 12: Create a new SAML group.
- The SAML group page is where the created groups will be visible.

Figure 13: All of the created groups are listed.
Step 7: Testing
- When a user visits https://myaccount.google.com/, the portal authenticates their identity. Following a successful login, the user chooses the nine dots in the top right corner, which brings up a list of programs, one of which allows the user to log into Splunk Application.
Figure 14: Google account after successful login
- After successfully logging in, the user will have access to Splunk.
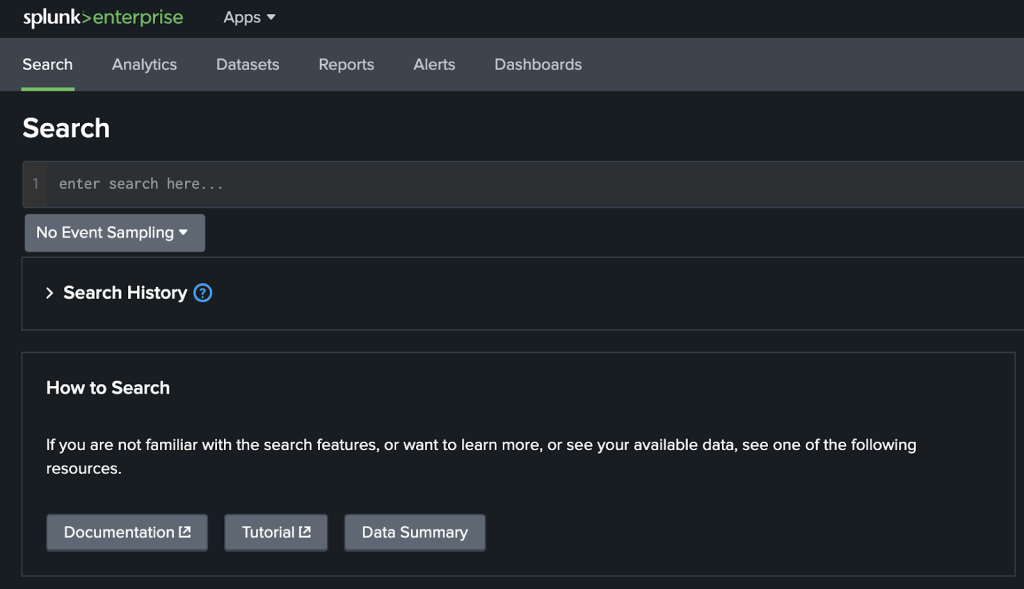
Figure 15: Visit Splunk application